Pages

Wednesday, December 18, 2013

A Tale of Two Tops

A tale of two tops - one more successful than the other…  

Start with the success:  I have been inspired by all the "Luxe" sweatshirts out there in sewing blogland and wanted to make one for me.  I had some stretch lace that was going to be a dress, but the muslin was a fail and I was frustrated with that project so I decided that it was the perfect luxe fabric for the sweatshirt.  
Silver stretch lace backed with an aqua spandex jersey


I lined the stretch lace with a stretchy aqua jersey knit that I purchased from Fabrics dot com and then treated the 2 fabrics as one.
The gray is a light weight ponte knit from the same site.


I ordered 3 swatches before I got the right color of aqua and the right gray fabric.  I'm not a fan of ordering online, but choices for brick and mortar stores are so limited these days.  
Any hints for ordering online would be appreciated.


I ordered this pattern at the same time. Patterns are MUCH easier to order online!  :-) I made version A and sewed a straight up XL, but probably could have made a Large.  I had to take it in quite a bit, but it is a sweatshirt and I wanted it to be roomy so I am happy with the fit.


I didn't change anything except to add a band to the bottom to make it a bit more sweatshirt-y looking.

My best shot at modeling - I was in sewing mode with no make up = no head shots.
I'm happy with how this shirt came out an can't wait to wear it!

Shirt # 2…Not quite as happy with.  I had some beautiful gold loose-weave sweater knit in my stash and was thinking of a flow-y cardigan, but saw a tunic in a store window and decided to give that a try.  

I had this pattern dated 1999 and decided that I could shorten it and get the tunic look I was looking for.  I made version A in a small.


I'm ambivalent about the style on me.  I think that the neckline is too wide for me and the loose weave fabric clings to me in ways that are... not showcasing my best features.  Drop sleeves are not the best look for me either.  I added the bow to try to salvage it and I think it made it worse.  Time to say uncle on this one!
So…I think this is a wadder…live and learn.  I may try to reuse the fabric for another sweater - maybe the cardigan that I originally envisioned.  

I have been working on some other projects, but they are super-secret Christmas projects.  I'll post more about those after Santa makes his appearance.  

Wishing everyone happy holidays full of family, friends and love!


Wednesday, November 20, 2013

More Pinterest yumminess!

I should have titled this series "Seven Days of Pinterest" rather than "Pinterest Week."  That might have given me more flexibility on my time-challenged issues!

So here it is:  Day # 5 of the longest Pinterest Week of your life!  But sooo worth the wait!

Pulled Pork Tacos with Pineapple Salsa
from
Cheryl Style


 We had this for a big family birthday celebration for my DD#2's bday.  What a deal!  Two bone-in pork shoulders simmering in two big crockpots and we had dinner for 17 people (and one extra hungry, lacrosse-playing son!) with leftovers for lunch!


The verdict:  PIN IT!


Changes I made:

  • I used bone-in pork shoulder.  It was cheaper and the bone gives good flavor to the meat...  And they were out of boneless.
  • I popped it in the crockpot the day before the party while we were cheering Navy on to victory against Hawaii so it never got turned and cooked for a bit longer than the recipe recommended.  It didn't seem to hurt it a bit.
  • The next day, I added about a tablespoon of chili powder to the pork because I thought it needed a bit of heat.  I put the pork in a large roaster pan, covered it with foil and put it in the oven at 325 to reheat.  The extra time in the oven the next day allowed the flavors to really meld and caramelized the meat a bit.
  • I made the salsa just like the recipe, but left in the seeds, etc in the jalapeños because we like things a bit spicy here at Casa Feasts and Fabrics.
This was an amazingly cost effective, prep-ahead, and delicious way to feed a crowd.  And since all the work was done the day before…I got to enjoy the party too!

One last tip orginally from the oh-so-smart Ina Garten:  Put your effort into a couple important parts of the meal and then cut yourself a break and buy part of it.  
My gift to me:  


Cupcakes from Cupcakes Actually.
So decadent!


My husband graciously volunteered to taste-test and choose the flavors for the assortment.  Such a big help my hubby!  :-)


Day #5 of Pinterest "Week"  a real crowd-pleaser!

Wondering where all the fabrics have gone?  I have several projects in the works.  I ordered some gray knit for my version of the luxe sweatshirt, but it turned out to not be what I was thinking - too sheer and sparkly.  I'm waiting on another order and hoping that it is more what I was hoping for.  I so miss neighborhood fabric stores where you could actually see and touch the fabrics!

Sunday, November 10, 2013

Pinterest Palooza continues into book club night.

Even Book Club wasn't exempt from Pinterest Palooza at Casa Feasts and Fabrics.  

Pinterest Dinner #4:


Low Carb Chicken Wraps


All of my Book Club friends and I are watching our girlish figures so we are always looking for book club dinners that we can enjoy and still watch our calorie/carb intakes.  

Subbing the wrap for lettuce and low-cal, high protein chicken breasts…worth a try.


The verdict:  Pin It!!!


Using some help from a good bottled teriyaki sauce made this a fast and delicious and just six chicken breasts made a TON of chicken for wraps. 

I fed 6 hungry book-clubbers, one hungry husband and one hungry daughter and still had enough for a couple of lunches.  


Changes I made:
  • I doubled the recipe.
  • I sprinkled the chicken breasts with some of the greek seasoning and then grilled the chicken breasts - much easier than trying to brown the chicken in batches in a pan.
  • After the chicken was mostly done on the grill, I chopped it into 1/2 inch cubes and added it to the sauté pan with the vinegar and the remaining Greek seasoning.  It is quite possible I used more greek seasoning than was called for.  (I'm not a great measurer - especially on a Friday evening!)
  • I added the teriyaki sauce and mixed it in to taste (Again, probably definitely added more than the recipe called for) and then removed the pan from the heat and added the cilantro, green onion and sunflower seeds just as everyone arrived.
  • I used red leaf lettuce instead of swiss chard leaves.  Although I think that the chard would have been delicious, the local grocery store didn't have any chard on Friday evening when I needed them.
This was a great meal for a potluck or to take to someone's house for new baby meals, etc.  It can be eaten warm or cold.  (I've tried it both ways and it was great!).  If you are not watching carbs, it would also be wonderful in a wrap.   

I tweaked this recipe more than my other Pinterest features this week, but still a winner.
More Pinterest fun tomorrow!  Until then!


Saturday, November 9, 2013

Day #3 - Pinterest Week

I know you have been waiting for day #3 of Pinterest Week.  
Drum roll please….Day #3 is….


Garlicky Swiss Chard and Chickpeas
from:  Foodie Crush


Garlicky Swiss Chard and Chickpeas


I cooked this up as a yummy side with some marinaded flank steak and a baked sweet potato. 

Sweet potato secret:  Sprinkle some cinnamon on top.  Mmmmmm...It's hard to decide if it a dessert of part of the dinner.


The verdict:  Pin It!


Both DD#2 and DH voted this the best swiss chard recipe ever - even better than the ones I've made with bacon - what?!  Although, both agreed that adding a little bacon would not have hurt this recipe, either.  :-)

Cooking the chard in chicken broth helped make it nice and tender and mellow tasting.  The garlicky flavor and the salty feta really made it pop.  Definitely a do-over!

Changes I made:

  • I used one large bunch of Swiss Chard instead of two (That Sunday night shopping trip left us with sad pickin' in the chard department.)  
  • Because a big pile of chard cooks up to nothing, I added a big box of baby spinach to make enough to serve 4.  If you want enough to serve 4, get 2 bunches of chard like the recipe calls for.  It will look like a ton, but - I promise - cooks down A LOT.
  • I used some of the stems.  You can see the little red beauties in the top picture above.  I really hate to waste them and they taste really good if you cook them right.  I cut them on the diagonal and added them to the pot.  It calls for the chard to simmer for 15 minutes in the broth and that is plenty of time for those skinny jem-bright stems to get to just the right barely soft texture.
If you've never tried Swiss Chard, this is a great starter recipe.  Mild chard flavor that lets the other bold flavors shine through.  

So 3 new Pinterest experiments in 3 days and 3 wins!  I'd call that a success!
Another new Pinterest adventure tomorrow…Until then!


Wednesday, November 6, 2013

Pinterest Week Continues...

And the Pinterest fun continues...

Tuesday's Pinterest Feast:
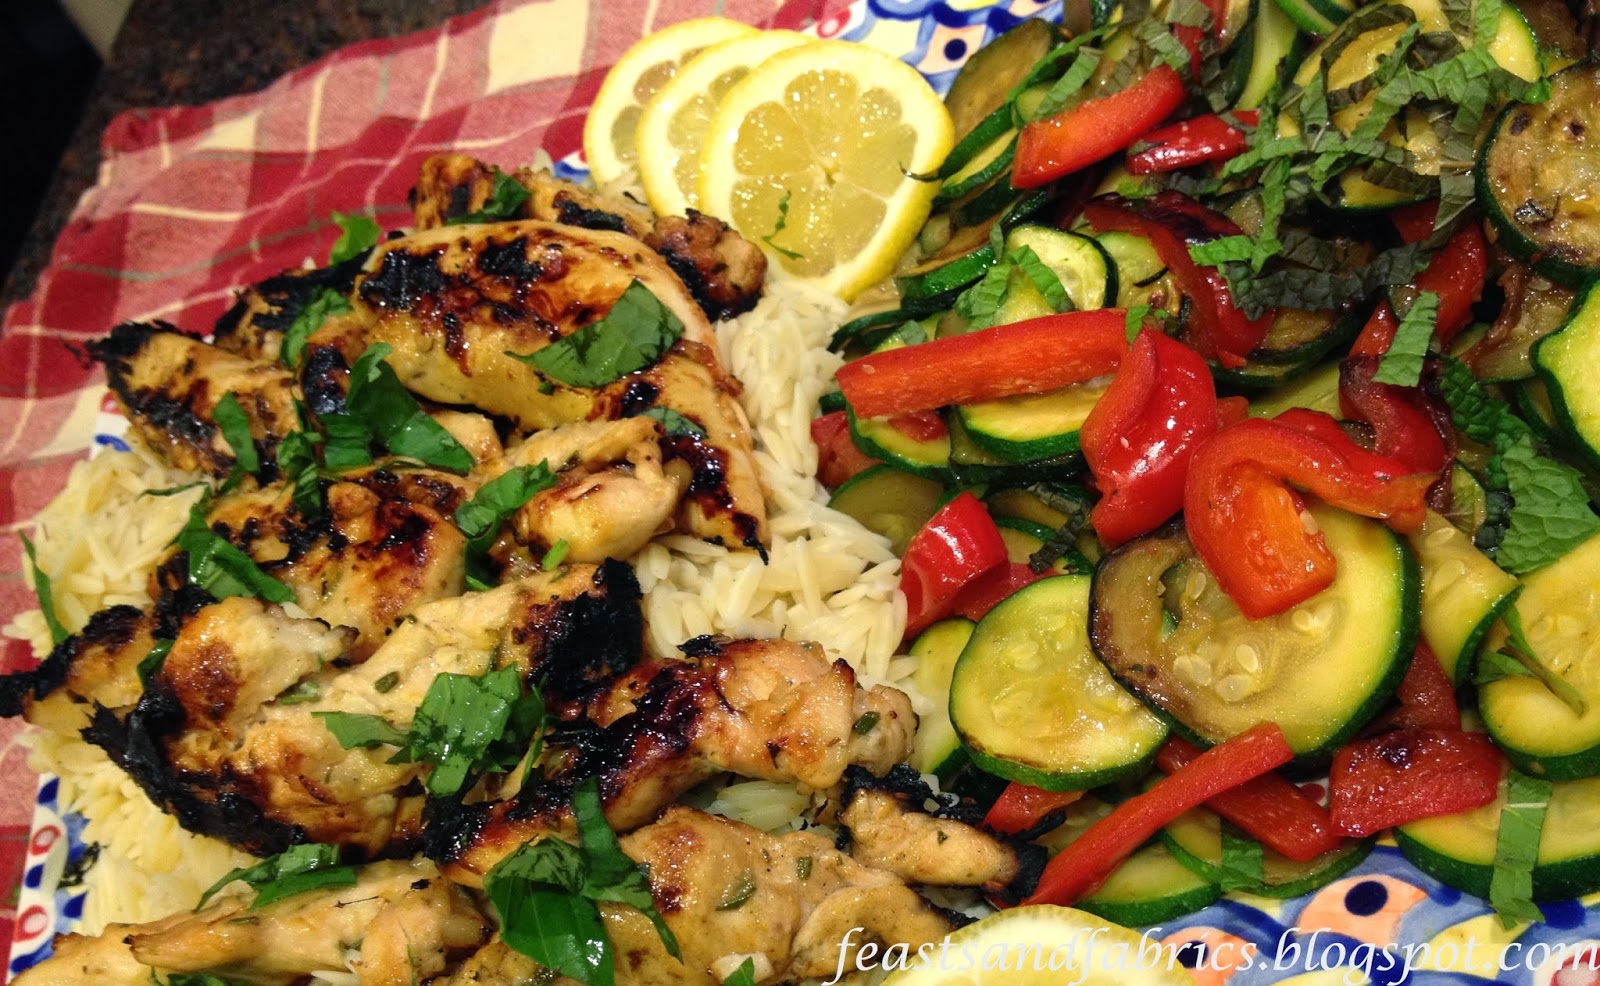
Lemon Rosemary Basil Chcken
from:  Tidy Mom


Sorry about the blurry photos - we were in a hurry to serve up because it smelled so amazing!


The verdict:  Pin It!  
This dish uses chicken tenders in a quick, sweet-tangy, lemony marinade that tenderized the chicken and left the, normally blah tenders with some serious flavor.


Changes that I made:

  • I used 2 Tbsps of olive oil instead of 4
  • I used a bit more lemon juice - cuz my lemons were big and I didn't want to waste the extra couple Tbsps.
  • I used more garlic and rosemary - 4 cloves of garlic instead of 3 and 1 1/2 tsp fresh rosemary from the garden
  • I rushed the marinating a bit.  I think that it would have been even better if I had given it 45 minutes or so.
For the side, I made up a quick zucchini sauté inspired by my time in Italy:
Sauteed zucchini with mint
  • 2 cloves garlic, thinly sliced
  • 4-5 small zucchini, thinly sliced
  • 1 red pepper, sliced
  • 4-5 large mint leaves, thinly sliced 
  • Olive oil (about 1-2 Tbsp)
1.  Heat oil over medium heat in a non-stick pan.  Add garlic slices and sauté until lightly golden brown and fragrant.  Remove garlic from pan, leaving the flavored oil. Be careful that you do not burn the garlic or you will have to start over with a clean pan because burnt garlic is very bitter.
2.  Add the peppers to the garlic-flavored oil in the pan and sauté until just beginning to soften.
3.  Add zucchini slices to the pan and allow them to lightly brown on one side before turning them over.  Continue to sauté until the zucchini are just past crisp-tender.
4.  Remove to a serving platter.  Sprinkle with coarse salt, and sliced mint.  

If you are really lucky, you have a great friend who brings you finishing oils from New York City and you can drizzle your zucchini with that - and boy was it good!  Thanks Jill!
 

It's Pinterest Food Week in the Feasts and Fabrics Kitchen!

I avoided joining Pinterest - for about a second - and then gave in and have spent many hours happily perusing and pinning.  But what do you do with all those pins once you pin them???

 Welcome to Pinterest Food Week at 
Feasts and Fabrics! 

Every day this week I will be making a dinner that I found on Pinterest linking you back to the original blog post.  I'll let you know if it was worth pinning and any changes I made to the dish.

Monday night's Pinterest Feast:
White Beans with Spinach and Sausage
From:  It's My Side of Life
The verdict:  Pin it!  Sooo delicious!  This dish went together in a snap and there was hardly any clean up. 

Changes that I made:  
  • I used Andouille sausage in place of the kielbasa called for in the recipe.  (Wegmans was strangely out of kielbasa when we went shopping this week.  Ok.  we were shopping at 8 pm on a Sunday night so maybe not so strange.  Have I mentioned that Hubby and I are both night people?)
  • I used a bit of oil in the bottom of a dutch oven to brown up the sausage slices and then added the chicken broth and garlic.  I didn't add any more oil.  
  • I added a bit more spinach and tomato than the recipe called for.
I made some quick toasted cheese with a hearty multigrain bread and some shredded provolone.  Popped it under the broiler until the cheese just started to look bubbly and a tiny bit browned.  Perfect for dipping in the broth.

Who knew beans could taste so good?!!!  So…I'm calling it a Pinterest success!  

Recent Pinterest fail:  Do not write on your washing machine with dry erase markers - no matter how much you want to remember not to put your giraffe-print shirt in the dryer.  It might take you a couple hours to get the marker off.  Just saying

Pinterest successes?  Failures?  Clue us in to what to pin next!

Monday, November 4, 2013

'Tis the Season to... Sew for Others

I have two new projects for me in mind, but am waiting for a pattern and some fabric to arrive…Tomorrow?

In the meantime, I have been stealing snatches of time to sew for friends.  I made 2 more of the lunch bags like mine for 2 lovely young ladies' birthdays.  One for my DD #2 who turned 23 (!) and one for my walking buddies daughter.

More pretty lunch bags!
I was able to fussy cut one, but there wasn't enough fabric to squeeze out another with the design in the center.  The fabric is so pretty that I don't think anyone will mind.  I used more stiffener in the bottom of these bags to give them more shape.  I didn't tackle the zipper - I know…I promised - but #2 and #3 sure go together in a snap and I was in the mood for a fast, fun project without too much thinking.  DD #2 loved it!

Tonight's project was for a co-worker who just got married.  She has an amazing blog that you should check out if you are at all into food:  Ellen In the Kitchen  

So what to make a fellow foodie?  Embellished kitchen towels, of course!
Have I mentioned how I love my embroidery machine?
Kitchen Towels that walk on the wild side!
The towels are the burgandy and gold of our school's colors and the zebra stripe?  Well…everyone knows that all teachers - especially high school special education teachers have to enjoy living on the wild side just a bit!  :-)

I'm hoping that you have a little bit of a chance to find your wild side this week!


Monday, October 21, 2013

Wine, Bacon, and Pasta...A Food-Centered Weekend!

We had the BEST weekend this weekend.  It started with dinner and a movie with my sweet god-daughter and niece on Friday night.  Gravity is a fun thriller (even if it is a bit far-fetched!).

Saturday was all about fall and farm and vine with a farm tour and wine tasting at a local vineyard. 

My hubby and me enjoying the beautiful fall foliage with a glass of wine!


The tour included a barrel tasting.  It was so interesting to taste the difference in the wines as they matured!


The highlight of the day, though, had to be the bacon on a stick.  Yep!  That is thick sliced bacon with a sweet/spicy rib rub slathered over it that was just delicious.  Who knew that bacon went so well with wine???


Since we are on a wine theme and just to make sure that Monday wasn't too jealous of the weekend...I made my husband's favorite pasta dish -
Wine Poached Salmon, Pasta and Snowpeas.


I started making this dish way back in the '80's after I picked up a recipe card in the grocery store by a Robert Mondavi wine display.  It has morphed a bit over the years - more veggies - less butter, but my husband pronounced it still a winner tonight at dinner.  

So here's to Monday! Enjoy a nice glass of wine - in a glass or in a sauce over pasta.  Happy Monday!  :-)

Wine-Poached Salmon Pasta with Snowpeas
  • 8 oz pappardelle pasta
  • 1 lb Salmon file, cut into 1/2 inch strips
  • 4 cups sugar snap peas cut diagonally into pieces
  • 1-2 cloves of garlic, chopped (I always use 2!)
  • 2 tablespoons fresh ginger, chopped
  • 2 tablespoons fresh lemon juice
  • 1/2 cup White Zinfandel or Rose wine
  • 1/2 cup water
  • 2 tablespoons butter
  • 2 tablespoons fresh chives, chopped
  • Salt and Pepper to taste
  • 1 tsp lemon zest, grated
  • Parmesan cheese to garnish
1.  Prepare dry pasta per package directions.  Add snap peas to water when pasta is nearly done - just until snap peas are bright green.  
2.  Save 1/2 cup of starchy pasta water.
3.  While pasta is boiling, in a small saucepan bring wine and water to a boil.  Add Salmon strips and reduce to a simmer.  Poach about 2 minutes.
4.  Remove Salmon and reduce stock to 1/3 cup.  Add lemon juice, ginger, and garlic.  Remove pan from heat and stir in butter until sauce thickens.
5.  Toss in pasta, snap peas and Salmon.  Add a bit of the starchy water if pasta is a bit dry.  
6.  Sprinkle with chives, lemon zest and a frosting of Parmesan.


Monday, October 14, 2013

Styling Lunch Tote

Last year I bought the cutest fabric at Hobby Lobby to make a new lunch tote to replace my raggedy looking old one.  Yesterday, it was finally complete!
Vera Bradley move over - There's a new lunch tote in town!
I don't know why, but I agonized over the construction of this simple bag.  I googled, I pinterested, I pondered.  And then I made it in an afternoon. 

It is just a 14 x 15 inch rectangle with two 2.5 inch squares cut in the bottom so that I could make the bottom of the bag.  I lined it with insulbright and a wipeable, waterproof lining.  

The draw string top was sewn together - side seams, casing, and then sewn to the bag top - right sides together.  Lastly, I pushed the drawstring part to the inside of the bag, pressed the top seam and then top stitched at about 1/2 inch all around.  Easy.

...And did I mention that I think it's pretty cute!


It is a bit different then I originally envisioned, but it does what I wanted it to do:

  • It is cute (vitally important!) - and shows off the coordinating fabrics that I fell in love with. 
  • It is big.  Big enough for my mega-clean-eating salads and snacks.
  • It is lined with a wipe-able, waterproof fabric (ordered from Fabrics dot com)
  • It has long enough straps to sling over my shoulder on the way to work.


I bought a zipper for the top (one of the reasons I was pondering and stalling I think) but then a slight miscalculation with bag width made it just too skinny an opening for my mega-lunches so it turned into a drawstring top.  

I actually like the drawstring, though.  It gave me a chance to showcase the striped fabric.  


So happy with the way the pattern lined up on the sides!
Groovy, right?


Even though I lined the bag with insulbright lining, with the drawstring top, I'm not sure it would really insulate too much.  


I keep my lunch in the fridge anyway.


Things I'll do better next time:

 - Treat the main fabric, insulbright and water proof lining as one and seam with a french seam.  (I lined it like a traditional bag and the lining is a bit floppy inside)

- Make the bag a bit shorter and a bit wider 

- Don't let the zipper intimidate me!  Next bag will have a zipper.  I swear!
Ok zipper...You're going here next time!

So, after a year, the pondering is over and the lunch bag is born!  Almost makes packing a lunch for my return to work after the weekend a bit less painful!  Almost.

How about you all...Has anyone else ever spent tons of time pondering a project and then found that it was not nearly the challenge that you thought it would be?  
Share your happy ending - leave a comment.  :-)

Saturday, September 28, 2013

I Won!!!

I won!  I never win.  But...I won!  


I won a really cute bag pattern from Stacy at Stacy Sews.  Stacy's blog was the first blog that I ever followed so I think it is especially apropos that hers was my first blog giveaway win.  Stacy has some very creative ideas and does a great linky Thursday post each week.  Hop over there and check it out!

Thanks Stacy for the adorable pattern!

But before any sewing or cooking can happen at Casa Feasts and Fabrics, we have to finish up the painting in my new "roommate's" (AKA my daughter's) room.  We are taking out the teen look and moving to a more sophisticated - we hope!- young adult room that can morph into a guest room when she saves enough for her own place.  

Here is a sneak peek at the before pics:


The cutesie border has to go...


Painting over the chalkboard...Not so easy.


We are doing most of the painting after work, after working out, after dinner, so between 8pm and 11pm.  We've finished the chalkboard half of the room and are working to get as much done of part 2 before the weekend flies by.


Don't let the smiles fool you.  Weeknight painting...not my favorite.


Thursday, September 19, 2013

The last little bit of summer sewing.

I always have so many projects lined up that I could never in a million years finish them...At least as long as I have this full time job gig that keeps interfering with my hobby life!  :-)

I bought a bunch of summer-y fabrics this summer and was determined to actually sew them up in the same season I bought them.  The first one was the sweet white burnout knit that got made into the little sleeveless sweater I blogged about here.  I have gotten so much wear out of it that it is almost worn out already!

I also bought some stretch denim in a cool graphic floral print.  I knew right away this would be a short pencil skirt for summer. And a couple of weeks ago...just in time to still officially be summer...I completed it!
My late season zinnias match my new pink cardi!  :-)
I was going to use a straight skirt pattern from my stash, but while visiting my husband's family in King of Prussia, I dashed into a local fabric store - Obviously! - and saw Pamela of Pamela's Perfect Patterns.  I had seen her patterns sewn up while visiting the blog over at Lucky Sew and Sew.  So I grabbed up the Magic Pencil Skirt pattern and some of her Fantastic Elastic and gave it a try.  

The first thing I noticed is that the pattern measurements are very generous. Pamela has you measure your waist, hips and low hips and tells you to choose the largest measurement because you will take in the rest.  My largest measurement fell at the low side of the medium pattern. Medium?  Yes!!!
Working the model poses - or something...
I am such an "apple" that I ended up having to take it in quite a bit through the hips and thighs and it was still a bit more roomy than I really wanted for a pencil skirt.  Even the waist actually ended up being a bit big.  I also shortened it a few inches for a summer skirt look.

I think that next time I will actually try a small (Worth buying the pattern just to say that I am going to make a small next time!) and grade up to a larger waist size.  I think that I will get a better over all fit for my shape and will keep the pegged look better.  It fit well enough to wear it to work the next day and was certainly comfortable.

Overall it was a super easy pattern to make and I learned a lot about fitting me - which is my big goal in sewing right now.  I am definitely going to try another one!  I was happy to get two of my summer sewing projects done.  I still have several fabrics to sew up, but I think that I can use those for some cross-seasonal garments.  Maybe this weekend?  Is it wrong to hope for rain so that I don't feel guilty about spending the weekend in the basement sewing room???

Anyone else out there use Pamela's patterns?  What do you think?

Tuesday, September 17, 2013

I'm back! And With a Monogrammed Pillow.

Wow!  It has been a long time since I posted!  A new job and some road trips to visit our son in college have dominated my time.  

Not that I haven't been cooking and sewing...I mean a girl has to have some creative time, right? It just came down to cooking and sewing or blogging about cooking and sewing...and you know what choice I made!

The good news:  I have a number of projects lined up to blog about - starting with this monogrammed linen pillow:

Monogrammed linen pillow
 I made this for a special friend's birthday.  She and I have a wonderful friendship based on many shared passions. She is also one of the most thoughtful people I know - one of those people who always know just the right thing to say at the right moment and the right little gift to give to make you feel so special.

I do not have the gift of gift-giving.  But I wanted a really special gift for my friend.  I thought and thought about something to buy her for her birthday, but could not come up with something that was special enough for my dear friend.  Then I remembered a book of monograms that she gave to me years ago.  On the cover is a natural colored linen with a large ornate monogram on it.  Perfect!

I had some nice linen left from a set of embroidered collars I made for some fall dresses for my daughters.  I had a pillow form.  I had a pocket of time to sew.  A birthday gift was born!

Of course, the monogram on the cover of the book was hand embroidery and time factors ruled that out.  I think that the embroidery machine did a good job with the monogram for the time that I had.
A twist on a traditional monogram
The tassels on the corners of the pillow came from some trim from a $5.00 fill bag at a home dec store that we visited during our Stitchin' Charleston Style trip.  
Overall it was a satisfying afternoon of sewing and I was happy to give my friend a gift that came from my hands and heart.  

Sunday, August 18, 2013

Beach Sewing


Enjoying the last of summer has kept me from blogging, but, boy did we have  a wonderful time at our favorite beach house!  

Sunset Kayaking at my favorite place in the whole world!
We had two houses and the whole extended family.  The weather was perfect!  We filled our days (and I mean filled our days) with beach going and kayaking and ghost crab chasing and feasting and toasting the sunset each night!  It was sooo hard to come home! 


 Even with all the competing activity, I did manage to get a bit of embroidery done.  I worked on the tea towel from one of my Stitchin' Charleston trips. 
This is the start of Rainbow Row in Charleston


The houses are linen squares that are pin stitched onto the towel.  

The next step was to add the house details.  Here I have started the windows and doors.


A little more done...

Almost done!  Just needs a wash and press


Here I have added all the details:  Wrapped chain stitch palms, crepe myrtles, and even little flower boxes under the windows.  

Laura Jenkins Thompson, the designer and teacher of Stitch' Charleston Style is the most creative person!  Her designs are full of adorable details.
I'm loving it in my coral bathroom!


 Well...I didn't get nearly the sewing done this summer that I wanted to, but at least I got one UFO done!  

Enjoy the last few days of summer!!!