Pages

Showing posts with label sewing. Show all posts

Saturday, August 23, 2014

Things I Have Been Doing While I Haven't Been Blogging

It has been a long time since I last posted!  I haven't been idle...just came down to blog about stuff I'm doing or actually doing stuff.  

So things that I have been doing:

  • Gardening
  • Stitching
  • And of course...Cooking

School is getting ready to start again...where did that summer go???
I promise to try, try, try to post details of some of my favorite doings in the next couple of days.  

Until then...Enjoy the last little bits of summer!

Thursday, September 19, 2013

The last little bit of summer sewing.

I always have so many projects lined up that I could never in a million years finish them...At least as long as I have this full time job gig that keeps interfering with my hobby life!  :-)

I bought a bunch of summer-y fabrics this summer and was determined to actually sew them up in the same season I bought them.  The first one was the sweet white burnout knit that got made into the little sleeveless sweater I blogged about here.  I have gotten so much wear out of it that it is almost worn out already!

I also bought some stretch denim in a cool graphic floral print.  I knew right away this would be a short pencil skirt for summer. And a couple of weeks ago...just in time to still officially be summer...I completed it!
My late season zinnias match my new pink cardi!  :-)
I was going to use a straight skirt pattern from my stash, but while visiting my husband's family in King of Prussia, I dashed into a local fabric store - Obviously! - and saw Pamela of Pamela's Perfect Patterns.  I had seen her patterns sewn up while visiting the blog over at Lucky Sew and Sew.  So I grabbed up the Magic Pencil Skirt pattern and some of her Fantastic Elastic and gave it a try.  

The first thing I noticed is that the pattern measurements are very generous. Pamela has you measure your waist, hips and low hips and tells you to choose the largest measurement because you will take in the rest.  My largest measurement fell at the low side of the medium pattern. Medium?  Yes!!!
Working the model poses - or something...
I am such an "apple" that I ended up having to take it in quite a bit through the hips and thighs and it was still a bit more roomy than I really wanted for a pencil skirt.  Even the waist actually ended up being a bit big.  I also shortened it a few inches for a summer skirt look.

I think that next time I will actually try a small (Worth buying the pattern just to say that I am going to make a small next time!) and grade up to a larger waist size.  I think that I will get a better over all fit for my shape and will keep the pegged look better.  It fit well enough to wear it to work the next day and was certainly comfortable.

Overall it was a super easy pattern to make and I learned a lot about fitting me - which is my big goal in sewing right now.  I am definitely going to try another one!  I was happy to get two of my summer sewing projects done.  I still have several fabrics to sew up, but I think that I can use those for some cross-seasonal garments.  Maybe this weekend?  Is it wrong to hope for rain so that I don't feel guilty about spending the weekend in the basement sewing room???

Anyone else out there use Pamela's patterns?  What do you think?

Wednesday, July 10, 2013

Sheer Summer Sweater

You know those times when it is as hot as the surface of the sun and you want to wear as little as possible. We have had a lot of those days lately.  I needed a little something to throw over a tank top that was not going to send my internal thermometer over the top, but would leave me a bit more covered up when appropriate at...say...church.
Just a little something to cover up a bit
I was ordering some fabric from fabric.com for a stretch lace dress that is currently in the muslin-ing stage and I saw this burnout white knit - perfect for the little bit of cover I was looking for.  


I grabbed this pattern (Vogue 1243) at Joanne's and decided to make version B.  When I got it home and read the directions (imagine reading directions! Ha!), I realized that the pattern is lined and had a dire warning:  Not suitable for knits!!!


Never being one for directions, I forged ahead - completely ignoring the directions and just using the pattern shape.  It was fine!


The solid selvage of the fabric became part of the front band.  I reversed the order of sewing for the center back of the neck band, sewing it so the 3-thread serger seam was on the inside.  I then stitched it down with a small zig-zag so it sort of looks like a flat felled seam.


I used a regular serged stitch for the shoulder and side seams and then finished the arm holes and hem with a tiny turned hem and a zig-zag which gave it a sort of scalloped effect.  
You can see the pretty burnout patter in this picture.  


I love this fabric! It is light as air which means it had some of the sewing challenges you would expect with such a light fabric.  It had a tendency to roll and was so light it was actually hard to hold onto as I was sewing.  Even with the challenges, the sweater was completed in just over an hour from cutting to done.  Don't you just love those kinds of projects! And...I have some fabric left for another little somethin, somethin. 


Next up...A silvery stretch knit dress lined with a stretchy turquoise.


I ordered a couple of fitting classes that were on sale at Craftsy (Thank you Sarah Gunn at Goodbye Valentino for posting about these classes!)  I have the muslin cut from some knit I've had in my stash forever and am working through the fit.  I'm not sure if I need to do a Full bust adjustment yet, but the class did help me to be more confident in choosing a pattern size with my crazy measurements and use the multi-sized pattern to my advantage.

I'll post some in-progress pictures if they are fit to be seen!  Wish me luck!


Wednesday, December 26, 2012

Casserole Carrier Project

I haven't posted a sewing post for some time, but I have been sewing and crafting - The Christmas surprises had to wait to appear!

So here is a first...Two posts in one day:  one Feast - one Fabric!

My daughter has recently become a "real grownup" with her own apartment, job, etc...and so she was in the need of some real kitchen supplies.  We got a great deal on a pyrex set for Christmas and I decided to make her a casserole carrier to go with it.  
I made this from some fabric left from a short and top outfit I made for the girls when they were little.
I used the tutorial by 2LittleHooligans with a few modifications.  

Pyrex has decided to change the design of their rectangular bakers by adding handles that stick out like wings.  Although a great idea for getting the dishes out of the oven, it was problematic when calculating the dimensions with existing tutorials.  

My solution...Add a band to the inside fold to add a few more inches to fit over the "wings."
See the coordinating band - About 3 or 4 extra inches there...
The other change that I made to the directions was to the handles.  The directions have you sew and then turn them.  I know better than to try to turn a 2-inch wide, 40-inch long tube filled with batting , but I tried it anyway...
Never try to make handles by turning them!


Here's the result...A lumpy mess that got stuck half-way through and refused to finish turning!  I spent a couple frustrating hours trying to make this work before I did it the way I know how to do it.


What I ended up doing is cutting the handle in one piece and adding 2 pieces of fusible batting along the center fold.
Fold it down the center and press and then fold over the seams allowances on the edges and top stitch on both sides.


Nice neat handles...No frustration!


No turning bulking, batting-filled narrow tubes!


I pretty much followed the rest of the tutorial as it was written and it all went right together.  My daughter was thrilled with her new carrier!  
I especially love the spoon holder! 

Monday, October 29, 2012

The Pencil Skirt the Hurricane Blew In...

So what's a girl to do when Mother Nature give you a hurricane day home from school? 
She heads straight to the sewing machine while she still has power and sews up that skirt she's been meaning to make since last winter!


Plaid Pencil Skirt
Back view - I'm pretty happy with the
plaid matching.

I found this fabric at G-Street on the $3.99 table when I was visiting the store for the class where I made this blouse.  I knew that it was going to become an easy, pull-on skirt, but got side-tracked by several other projects...and then it was spring...


At first I tried to draft my own pattern using a skirt that fits me.  It seemed like it should be easy, but low confidence in my pattern drafting ability and the fact that I'm still getting into the swing of sewing for myself after all these years made it a frustrating experience.


After multiple tries with a muslin, I realized that I really needed to use a pattern for a base.  Digging through my pattern stash I found an old 1988 pattern that may have even been my mother-in-law's.
It was just 3 pieces and the size 18 fit straight out of the package.  (Pattern sizes are nothing like ready-to-wear.  You wear 2-3 sizes smaller in ready-to-wear.  I've heard a lot of reasons why, but it is still shocking to say that I have to cut a size 18!!!)


The waist is 2 1/2 elastic and I added the lining


The only changes that I made to the pattern were:

  • Left out the belt loops 
  • Added a wider elastic waist instead of the 2 pieces of narrow elastic called for
  • Added a lining. 
  • Fringed the bottom hem instead of a traditional hem 


The lining is some tricot lining that I found in my stash.  


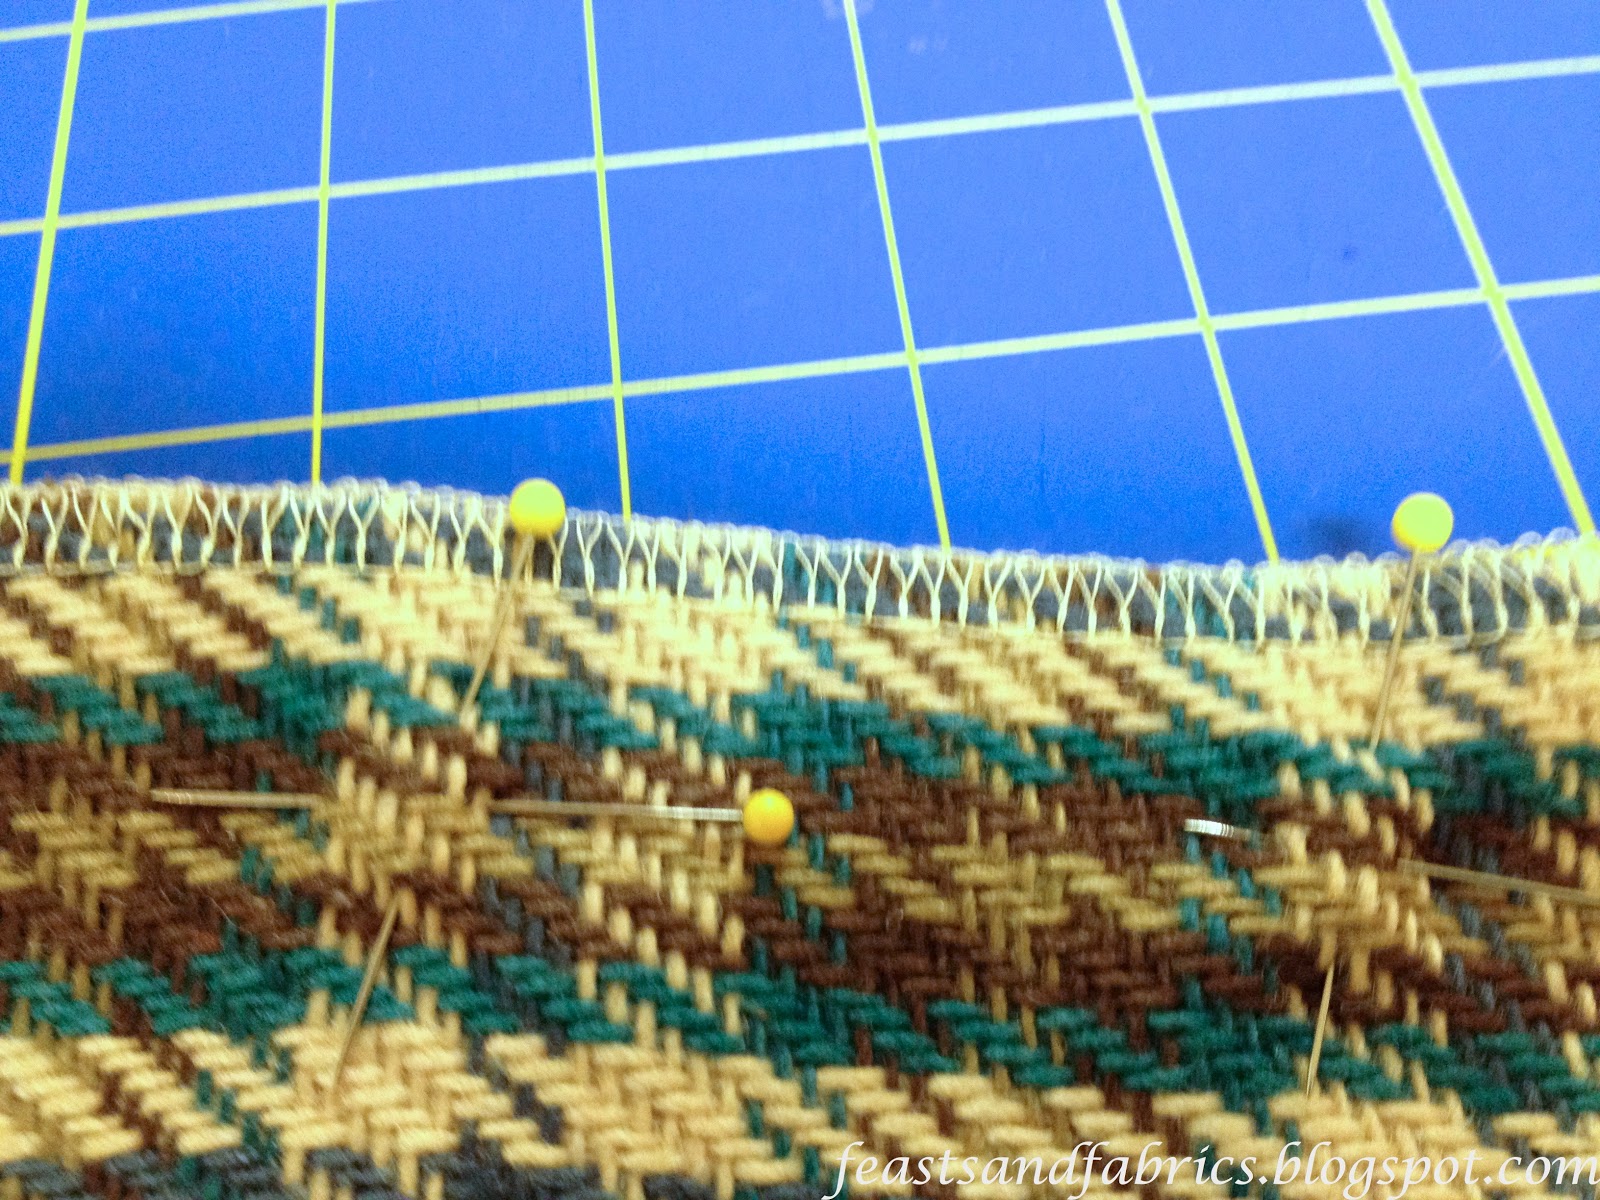
I sewed a tiny zigzag for the hem and then pulled
out the cross threads one at a time.  The plaid made it
easy to keep the hem straight.


I am especially proud of the plaid matching. I didn't worry too much about the vertical matching - just got the horizontal part to work.
Double pinned to match plaids


Since it is a loose weave I was worried about it shifting so I double-pinned it.


All accessorized and ready for winter!


I'm feeling good that I got one winter sewing project done.  Now if we still have power tomorrow....

Oh the possibilities!!!


If you are in Sandy's path, stay safe and dry!


Sunday, September 23, 2012

The "easy" little knit top that took all day...

I finished the knit top that I started yesterday and I'm happy with the result, but it wasn't quite as easy as I had hoped.  


Me sporting my new Butterick 5493 knit shell


The top is only three pieces and I tweaked the fit on Donna the Dressform yesterday so all seemed to be fine. I decided yesterday to be a rule-breaker - Soo not me! - and cut the pattern on the cross grain because there is a bit of a directional pattern to this print and I wanted it running up and down not around and around my curvy figure.  


Butterick 5493


The fabric was equally stretchy in either direction so I didn't have any problems. 

The pattern directions were basically good - I mean there were only 3 pieces! There was one place where they referred to a large dot and there was no large dot on the pattern, but it was easy to figure out where you needed to stop stitching. 


See how the arm holes don't gap at all!  Finally!


All went well until I got to binding the armholes.  They were gapping on the sides, so I took the sides in about a half an inch right at the arm hole and solved that problem.  When I put on the binding, however, the fabric was so stretchy that I ended up with a baggie mess!  So after several attempts (including sewing to the wrong side of the fabric - TWICE!), I was able to ease the fabric to the binding and ended up with a nice, not gap-y, no bra-showing armhole.  Happy!


I think that I will make this top again with one of the other neckline options, but I will make it a bit longer and will raise the neckline some.  It might be a little too showy for my 9th grade Bio students!  :-)


I think I'll try view C next.
With fall weather in full swing, I will probably wear it more as a layering piece - like this:  
Perfect for layering!
So even though it was a bit frustrating, I think I learn a lot about how to deal with bound knit armholes...Has anyone out there got any other solutions to make sure that the fabric doesn't stretch and there is no gap-osis?


I hope that the weather is as beautiful where you are as it is here!  


Love,
Pam

Saturday, September 22, 2012

Sneak peek of Sunday's project.

I vowed that this year i would take the time out of the school year weekend errands and craziness and actually do some sewing. (I have to admit that the beautiful weather is making it a really hard choice - sew or play outdoors...hmmm...)

Here is a sneak peak of the knit top that I cut out today and hope to sew up tomorrow.
Donna the Dressform is wearing it until I can whip it together tomorrow. Just three pieces! The perfect weekend project!

Sunday, July 29, 2012

Another UFO completed

Trying to tidy up my sewing room a bit after a whirlwind of projects, I found this blouse that I made at a blouse sewing class at G Street Fabrics this winter.


 I went with my friend Mary over at Passionate Perseverance.  We had a great time and got a lot of refreshers on sewing basics and fittings.

We finished most of the project in the class.  All that was left to do was sew on the buttons.  The poor top languished on the bottom of the to-do pile while other projects were completed ahead.  But a couple of minutes of hand sewing in front of the TV (I don't like machine-sewn buttons) and now...Another UFO is completed!

The fabric is a quilting cotton so it is a bit heavy for the hot weather that we have been having.  I will have to wait to wear it on a gloomy, chilly fall day.  I think that the pattern is bright enough that it might even wake up my sleepy 9th graders at 7:20 am!  Hmmm...Maybe...

Hope you are having a relaxing Sunday!

Saturday, July 28, 2012

Summer to the Maxi Dress- Take 2

I was so flattered when my son's girlfriend saw the maxi dress I made for my daughter and asked if I would make one for her.
Here is the result:


Cute, right?  Girl and Dress!  :-)


We found the fabric at fabrics.com.  It is an ITY knit.  I wasn't sure about sewing with this fabric at first, but now, after two projects with it, I am a believer!  The fabric is stretchy, but stable.  This means that it is very forgiving with cut and fit, but stays where you want it when sewing.  No crazy slipping all over the place.

I used a jersey needle and a tiny zigzag on my serger to keep everything stretchy.  I used the double needle on the hem for a quick finish.  In the past, I have had problems with "tunneling" when using a double needle, but I got some good advice from Leah at No Time to Sew and loosened the bobbin tension until I got the result I wanted.

I highly recommend this New Look pattern.  There is a picture on it on this post.  The directions were easy to follow and it easily goes together in a day.  I especially like the clean finishes on the inside of the dress.

Next up on the summer sewing list:  A few needed home dec projects. 
What have you been creating this summer?

Tuesday, July 24, 2012

Skirt To Dress Refashion


Yesterday's project was a dress-to-skirt refashion.  Today's is a skirt-to-dress refashion.  I found this very long, but not quite maxi, knit skirt in my recent closet purging.  It was desperately out of fashion and very unflattering, but I still really liked the fabric.  Thinking I might use the fabric to make some kind of a top for myself I hiked the dress up over my chest to see how much fabric there was and saw...a dress.  Not for me.  I just don't pull off strapless well, but my daughter has a cute little figure that I thought it would be perfect for.

Here is the skirt before the refashion:

See how thrilled my daughter is with the style?  haha!
Here is the refashioned skirt-to-dress:

So sassy cute, right?
We just pulled the elastic waistline up under her arms, tied some 1/4" elastic under the bustline to make the empire waist and marked it.  She didn't want to have the back be too blousy so the elastic is higher in the back than in the front.  This makes the hemline longer in the back than the front, which mimics the trailing back hem trend that we have been seeing in the stores. We stretched and stitched the elastic to the inside with a zigzag and - a new dress was born!

She wanted to be able to wear a regular bra with the dress so I happened to have a black t-shirt (also a closet purging find) that I am refashioning into a pillow for my son's college apartment.

Here's the T-shirt:


I borrowed a section from the bottom of the T-shirt to make the straps and even had enough left to make a cute little rosette for the bodice.

It's so hard to see details on black, but that is the rosette on the right there.
She went back to school today wearing the dress so I'm calling it a refashion success!  
Have you ever remade something that you liked even better than the original? 
 Leave a comment and tell us about it.
Now...Off for more fun with fabrics - and maybe even one feast tonight!

Thursday, July 12, 2012

Birthday Tote

Today was my son's girlfriend's birthday and I wanted to make something special for her.  What can any college-aged girl use?  A tote bag, of course!  I made this tote once before with my niece and really like the result.  The pattern is perfect for beginners like my niece and for more experienced sewers who are looking for a quick and easy project with a beautiful and practical end product.

I used this pattern that I bought at the Artful Quilter - which has since gone out of business.  :-(


It isn't really a pattern - just directions and dimensions for all the fabric pieces.  All the pieces are straight edges and the directions are simple and clear.  I cut out the bag yesterday in about an hour and a half and then sewed it together today in under two hours!  (It took a bit longer with my 12-year-old niece - but what a great project to learn on!)

Here is the finished tote:

Do you like the little monogram on the side?
The inside is lined with a coordinating pattern and has 6 little pockets:

So hard to get a picture of the inside of a totebag!
I already posted a picture of the one I made with my niece on facebook, but that was before I had the blog.  Sorry if this is a repeat.

Fuzzy picture!  This taken with my old blackberry - Awful picture quality!

Two projects completed in one week!  I'm in summer sewing nirvana!  
What are you sewing this summer?


Tuesday, July 10, 2012

Summer to the Maxi Dress

Finally, time for a summer sewing project!  It was one of those "drop-everything-and-concentrate-only-on-this" projects that I truly love.

My younger daughter came home for one of her whirlwind visits - just 2 nights!- so I figured I better get going on the maxi dress that she had requested while I had her physically here for a few fittings.

We found a cute black and white ITY knit at Joanne's on sale. The pattern we picked out was version B of this pattern:


I had not worked with an ITY knit before, but was very happy about how easy it was to work with.  It was a bit slippery and the edges tended to roll if I was not careful, but overall it was a nice fabric to work with.  Since I am still working on fitting adult bodies, I did make a muslin of the bodice.  Boy was I glad I did!  I ended up making a whole size smaller than the pattern envelope measurements indicated.  Other than that, I didn't have to make many adjustments.  The pattern directions were easy to follow and all the pieces fit together perfectly!  And...it went together in a day - a long day, but still one day.


Overall, I think mother and daughter were both happy about how this project turned out - even at 1:30 am when we put the final touches on the double needle hem so that she could take it back to school with her today.    :-)

Thursday, May 31, 2012

Are There Any Fabrics on this Blog?

I'll bet you're wondering where the fabrics are in Feasts and Fabrics.  I do sew - whenever I can.  Which, unfortunately, is not a lot during the school year.  I need time to really immerse myself in a project.  The "10, 20, 30 Minutes to Sew" philosophy does not work for me.  Sewing during the school year is limited to the occasional free weekend.  Never-the-less, I do manage to finish some projects....

One of my school-year projects (I started in the fall and finished just in time for the very last cool snap!)  was this fleece jacket that I saw in Fall issue of Sew Stylish Magazine.  


I used the tips that they included in the magazine - including eliminating seams allowances by using lapped seams.  I loved the idea of the faux leather trim!  This version looks so different from the picture on the pattern envelope that I almost didn't buy the pattern.  It is truly amazing what the right fabric can do for a pattern!

Here is a view from the back.  

I would tell you the pattern number if I could find it in my mess of a sewing room. My first project of the summer is always digging out and reorganizing after the chaos of completing projects during the school year.  

So...stay tuned...Only 2 more weeks until I am officially free to sew and create to my heart's content.  I just can't wait!