Pages

Wednesday, September 26, 2012

Roasted Chili Verde with Pork and Rice

 Roasted Chili Verde with Pork and Rice was on the menu for Monday night and it was delicious! It was from my fave Cooking Light this month (Oct 2012)
Roasted Chili Verde with Pork and Rice


I rushed home from work to get it going because, although the actual hands-on time for this dish is not too bad, but takes a bit of planning to pull it off because it has to cook for at least an hour to make sure that the pork gets nice and tender.  The pay-off is so worth it!  


The first step was to peel the papery covering off and roast some tomatillos.


Aren't these cool?  They have kind of a sticky film underneath the husk.


Getting tomatillos ready for the oven
After broiling for 15 minutes


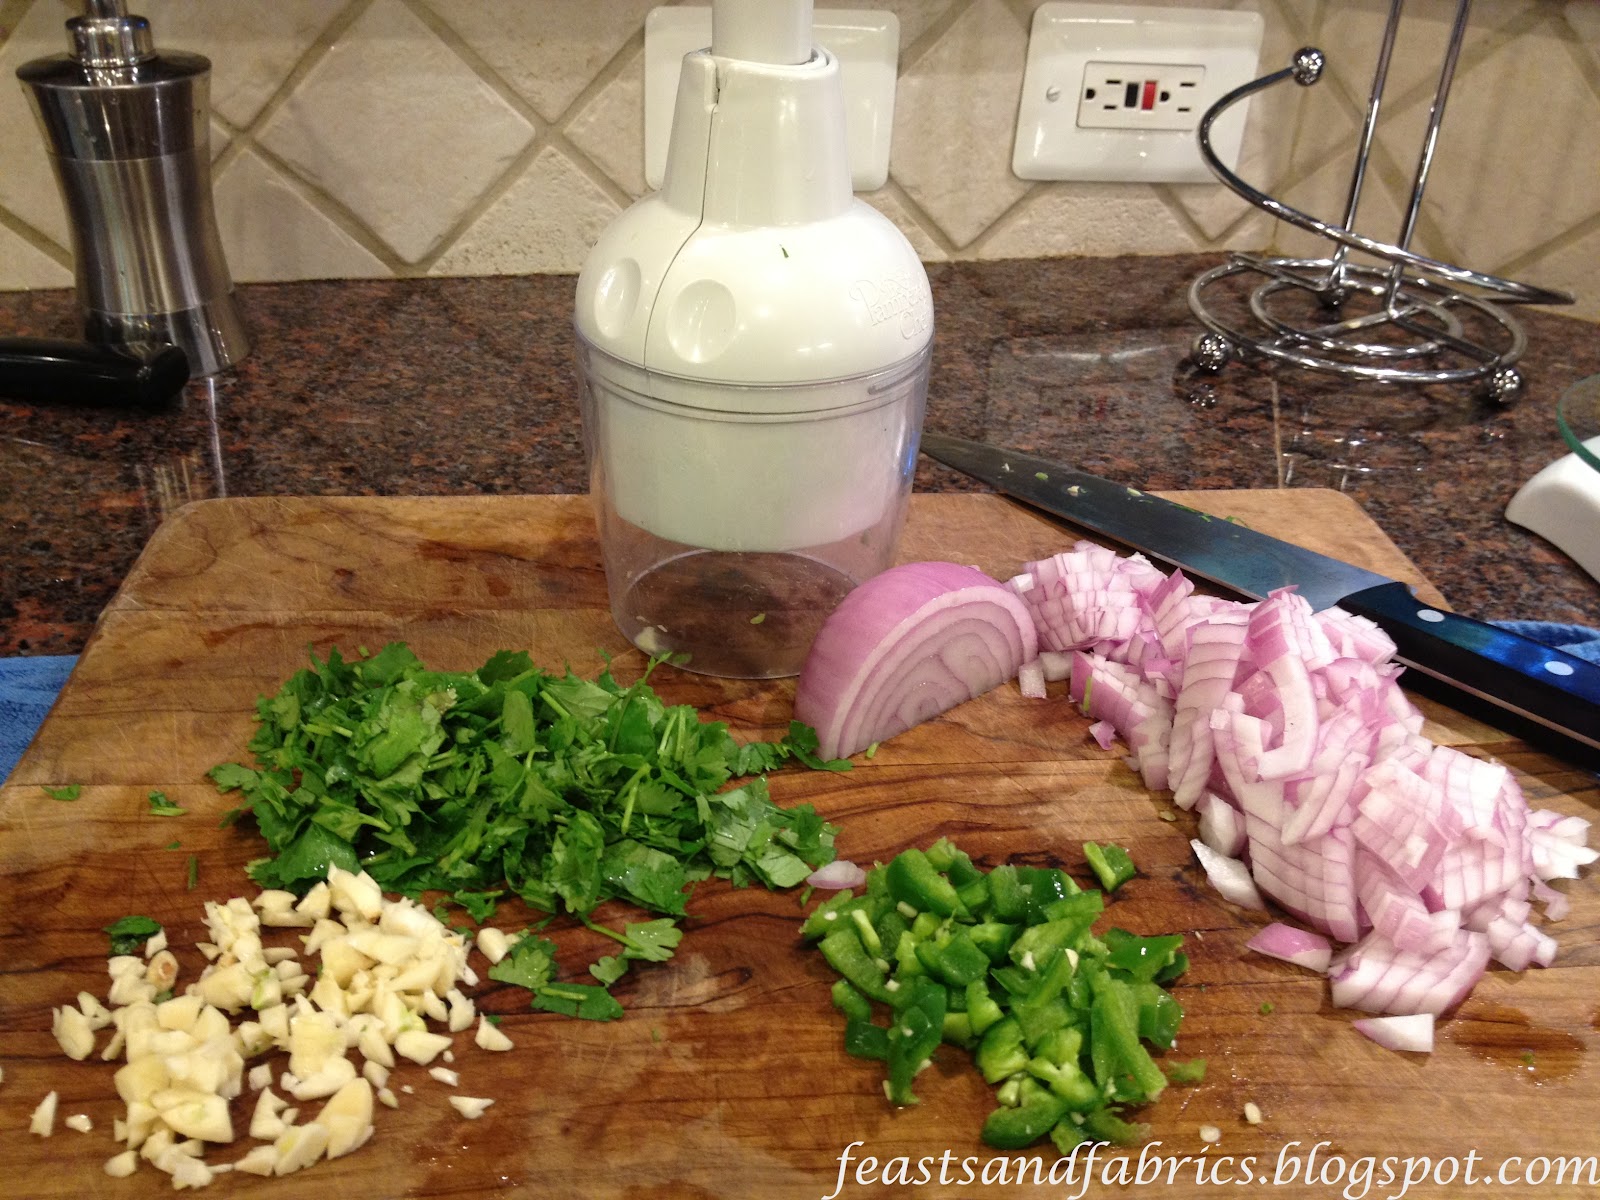
The raw ingredients for the salsa


After you roast the tomatillos, you take them for a spin in the food processor with some onion, sugar, garlic and jalapeño pepper.


This is the point where you wish this blog had smell-a-vision!  It smelled A-MAZ-ING!


While the tomatillos are broiling, I was browning some cubes of boneless pork shoulder.  And then it all went together into a pot to simmer for an hour or until the pork is fork tender. 

Now you have a pocket of time to run downstairs for a quick workout so that you have calories left to eat this deliciousness.  (Yes - I actually did do this!)

With about 20 minutes left in the pork cooking time, you throw some onion and rice in a pan with a touch of oil.  Add a can of mild chili-flavored tomatoes and some water and let it simmer by itself.  Plate it up... and...

Deeeelicious!  


I served it up with a simple salad of navel oranges and avocados.


My only regret...I should have made a double batch and frozen some for later! Oh well, next time - and there will be a next time!

Roasted Chili Verde with Pork and Rice
1 1/2 pounds tomatillos, husks and stems removed
1 cup chopped onion, divided
1/4 cup chopped fresh cilantro leaves
1 tsp sugar
2 garlic cloves, chopped
1 jalapeño pepper, chopped
2 Tbsp canola oil, divided
1 poud boneless pork shoulder (Boston butt), trimmed and cut into 1 inch pieces
1/2 tsp kosher salt, divided
1/4 tsp freshly ground black pepper
1 cup uncooked long-grain rice
1 (10 ounce) can mild diced tomatoes and green chiles, undrained
1 cup water
1 jalapeño pepper, sliced (optional)
Cilantro leaves (optional)

1.  Preheat broiler to high.

2.  Place tomatillos on a baking sheet or jelly-roll pan coated with cooking spray.  Broil 8 inches from broiler for 15 minutes or until skins blacken and tomatillos are soft.

3.  Place tomatillos, pan juices, 3/4 cup onion, and next 4 ingredients (through chopped jalapeño) in a blender or a food processor; process until sauce is almost smooth.

4.  Heat a Dutch oven over med-high heat.  Add 1 Tbsp oil to pan; swirl to coat.  Sprinkle pork evenly with 1/4 tsp salt and black pepper (I forgot this step so I threw it into the pan as the pork was sautéing - oops!)  Add pork to pan.  Sauté 6 minutes, turning to brown on all sides, Add tomatillo mixture to pan; bring to a boil.  Cover, reduce heat, and simmer 1 hour or until pork is very tender, stirring occasionally (It took mine about an hour and 20 minutes - I like it very tender.)

5.  Heat a large saucepan over medium-high heat.  Add remaining 1/4 cup onion; saute 2 minutes or until soft.  Add rice; sauté 3 minutes, stirring frequently.  Add remaining 1/4 tsp salt, tomatoes, and 1 cup water to pan; bring to a boil.  Cover and simmer 15 minutes or until liquid evaporates and rice is tender; do not stir. (Shhh...Don't tell...I stirred.)  Divide rice among 4 plates.  Top with pork mixture; garnish with sliced jalapeño and cilantro leaves, if desired.  


Sunday, September 23, 2012

The "easy" little knit top that took all day...

I finished the knit top that I started yesterday and I'm happy with the result, but it wasn't quite as easy as I had hoped.  


Me sporting my new Butterick 5493 knit shell


The top is only three pieces and I tweaked the fit on Donna the Dressform yesterday so all seemed to be fine. I decided yesterday to be a rule-breaker - Soo not me! - and cut the pattern on the cross grain because there is a bit of a directional pattern to this print and I wanted it running up and down not around and around my curvy figure.  


Butterick 5493


The fabric was equally stretchy in either direction so I didn't have any problems. 

The pattern directions were basically good - I mean there were only 3 pieces! There was one place where they referred to a large dot and there was no large dot on the pattern, but it was easy to figure out where you needed to stop stitching. 


See how the arm holes don't gap at all!  Finally!


All went well until I got to binding the armholes.  They were gapping on the sides, so I took the sides in about a half an inch right at the arm hole and solved that problem.  When I put on the binding, however, the fabric was so stretchy that I ended up with a baggie mess!  So after several attempts (including sewing to the wrong side of the fabric - TWICE!), I was able to ease the fabric to the binding and ended up with a nice, not gap-y, no bra-showing armhole.  Happy!


I think that I will make this top again with one of the other neckline options, but I will make it a bit longer and will raise the neckline some.  It might be a little too showy for my 9th grade Bio students!  :-)


I think I'll try view C next.
With fall weather in full swing, I will probably wear it more as a layering piece - like this:  
Perfect for layering!
So even though it was a bit frustrating, I think I learn a lot about how to deal with bound knit armholes...Has anyone out there got any other solutions to make sure that the fabric doesn't stretch and there is no gap-osis?


I hope that the weather is as beautiful where you are as it is here!  


Love,
Pam

Saturday, September 22, 2012

Sneak peek of Sunday's project.

I vowed that this year i would take the time out of the school year weekend errands and craziness and actually do some sewing. (I have to admit that the beautiful weather is making it a really hard choice - sew or play outdoors...hmmm...)

Here is a sneak peak of the knit top that I cut out today and hope to sew up tomorrow.
Donna the Dressform is wearing it until I can whip it together tomorrow. Just three pieces! The perfect weekend project!

Wednesday, September 19, 2012

Kung Pao Chicken Tacos - Fusion Fabulous!

A long day at work plus a hard workout meant I was on the look out for a fast and yummy dinner.  The answer appeared to be Kung Pao Chicken Tacos featured in the October issue of Cooking Light.  

Kung Pao Chicken Tacos 
The magazine claims inspiration for this dish from the "hip Korean taco trucks."  Apparently those are all over around here and, apparently, I am not hip enough (or just to tired!) to find them.  :-)  So I resorted to making my own.

Although they were delicious, the 30 minute prep time was a bit of a stretch.  There was quite a bit of chopping and mixing to get this dinner on the table!

The recipe called for chicken thighs - which I normally don't care for - but in this recipe they are a winner!  The sauce gives them a spicy sweet taste that was very appealing.  I warmed up/toasted the corn tortillas on the cast iron griddle that straddles two burners on my stove and they came out perfectly - A bit toasty, but still soft and pliable. 

My husband gave it two thumbs up and a definite do-over rating - although I think that he was rethinking when he saw the pile of dirty dishes that it created!

The bonus of the meal is...
 Leftovers for lunch tomorrow.  So...A little over 30 minutes prep and you get a dinner and 2 lunches - no food truck needed!

Kung Pao Chicken Tacos
  • 6 skinless, boneless chicken thighs cut into bite-sized pieces
  • 3 Tbsp lower-sodium soy sauce, divided
  • 1/4 cup plus 1 1/2 tsp cornstarch, divided
  • 1/4 tsp kosher salt
  • 2 Tbsp canola oil, divided
  • 1 1/2 Tbsp honey
  • 1 Tbsp dark sesame oil
  • 2 tsp rice vinegar
  • 1 tsp sambal oelek (ground fresh chile paste) (I get mine at H-Mart)
  • 1 Large clove garlic, minced
  • 3 Tbsp coarsely chopped dry-roasted peanuts
  • 3/4 cup diagonally sliced celery (about 2 stalks)
  • 8 (6-in) corn tortillas
  • 1/3 cup sliced green onions
  • 1/2 medium red bell pepper, thinly sliced
  • 4 lime wedges
1.  Place chicken in a large zip-top bag.  Add 1 Tbsp soy sauce and marinate at room temp for 30 minutes.  Remove chicken from bag; discard marinade. Place 1/4 cup cornstarch in a shallow dish.  Sprinkle the chicken evenly with salt.  Add chicken to cornstarch in dish, and toss chicken to thoroughly coat.  Shake off excess cornstarch.

2.  Heat a large skillet over medium-high heat.  Add 1 Tbsp canola oil to pan; swirl to coat.  Add half of coated chicken; saute for 6 minutes or until done, turning to brown.  Remove chicken from pan using a slotted spoon; drain on paper towels.  Repeat the procedure with remaining 1 Tbsp oil and coated chicken.

3.  Combine remaining 1 1/2 tsp cornstarch, remaining 2 Tbsp soy sauce, honey, sesame oil, rice vinegar, and sambal oelek in a microwave-safe bowl, stirring with a whisk until smooth.  Microwave at High for 1 1/2 minutes or until slightly thick, stirring twice.  Stir in garlic.  Combine soy sauce mixture, chicken , peanuts, and celery; toss to coat chicken.

4 Toast tortillas under broiler or on a griddle until lightly blistered, turning frequently.  Place 2 tortillas on each of 4 plates; divide chicken mixture evenly among tortillas.  Top each taco with green onions and bell pepper drips; serve with lime wedges.

Enjoy Your Fusion Feast!!!

Tuesday, September 18, 2012

Great Weekend of Feasting and Fabrics = Fun Hangover

My friend Nora and I escaped for a great weekend sewing workshop with Gail Doane this weekend and now I'm definitely suffering from a fun hangover! Getting up at 5:30 am has been a real struggle the last couple of days. 
The workshop was held in Richmond where our friend, Pat Goldman, sponsored the workshop at her beautiful shop, Chadwick's Heirlooms
My friend Nora and me with the very talented Gail Doane
Day 1 was a white pique dress with embroidered flowers.  That is Gail holding the sample dress.  All of the flowers are hand embroidered around hand-dyed buttons.  Many of the stitches use a casting on technique, so the flowers have a 3-D feel.  

Making a detached buttonhole flower


I'm hoping this doesn't become another UFO!
Here I am stitching away at a purple detached button hole flower.


Day 2 was a "notebook" class.  Gail made up some amazing binders with all the supplies we needed to learn a bunch of new and/or improved techniques from everything from adding smooth pipings and bindings to entredeaux and sash carriers.

Attaching entredeaux


We stitched from 9 am to 5:30 pm with just a 30 minute lunch break!  My head was about to explode with all the info!


Attaching piping to a curved yoke so that nothing stretches.


Gail has amazing energy!  Day 2 was mind blowing!


Gail Doane class at Chadwick's Heirlooms

Look at all the adorable embroidery and the scalloped binding!


Day 3 was a bit more relaxing.  We were working on this beautiful embroidered wool baby jacket.


Aren't these bullion roses so cute!!!


Making bullion roses with pearle cotton is so much quicker than making them with one little strand of floss.  I think this was my favorite part of the class!

But, even though we were very tired after all that learning and sewing, my friend and I had some time for after-class fun too.  There are so many great little restaurants and shops in Richmond to discover!

Can you even see me in this dark picture?


On the first night, after a shopping at some of our favorite haunts and a few new-to-me stops, we went to the Capital Ale House and enjoyed some delicious German Food.  On our last night we discovered a wonderful little gem called the Blue Goat which had a delicious and eclectic menu.  


So you can see that the "Fun Hangover" was well earned.  Feasting and Fabrics!!!  I went to bed on Sunday night dreaming of beautiful fabrics, sweet embroidery, delicious food and precious friendships.  

What a wonderful hangover!  :-)


Wednesday, September 12, 2012

Fall on a plate - Pork Chops and Apples!

The weather is cool. The windows are open.  It seemed like it was time for some fall on our dinner plate.  Nothing says "fall" more than pork chops and apples!   I found this recipe in this month's (September 2012) Cooking Light Magazine.

Pork Chops with Roasted Apples and Onions
My hubby was practically licking the plate!  This is not considered rude in our family.  It is a high compliment!  ;-)  

Pork Chops with Roasted Apples and Onions
  • 2 1/2 tsp canola oil, divided
  • 1 1/2 cups frozen pearl onions, thawed
  • 2 cups Gala apple wedges
  • 1 Tbsp butter, divided
  • 2 tsp fresh thyme leaves
  • 1/2 tsp kosher salt, divided
  • 1/2 tsp freshly ground black pepper, divided
  • 4 (6 oz) bone-in center-cut pork loin chops (about 1/2 inch thick)
  • 1/2 cup fat-free, lower sodium chicken broth
  • 1/2 tsp all-purpose flour
  • 1 tsp cider vinegar 
1.  Preheat oven to 400 degrees
2.  Heat a large ovenproof skillet over medium-high heat.  Add 1 tsp oil to pan; swirl to coat.  Pat onions dry with a paper towel.  Add onions to pan; cook 2 minutes or until lightly browned, stirring once.  Add apple to pan; place in oven.  Bake at 400 degrees for 10 min. or until onions and apple are tender.  Stir in 2 tsp butter, thyme, 1/4 tsp salt, and 1/4 tsp pepper.
3.  Heat a large skillet over medium-high heat. Sprinkle pork with remaining 1/4 tsp salt and 1/4 tsp pepper.  Add remaining 1 1/2 tsp oil to pan.  Swirl to coat.   Add pork to pan; cook 3 min. on each side or until desired degree of doneness.  Remove pork from pan; keep warm. 
4.  Combine broth and flour in a small bowl, stirring with a whisk.  Add broth mixture to pan; bring to a boil, scraping pan to loosen browned bits.  Cook 1 min or until reduced to 1/4 cup.  Stir in vinegar and remaining 1 tsp butter.  Serve sauce with pork and apple mixture.  

Serves 4 - (Serving size:  1 pork chop, about 1 Tbsp sauce and 3/4 cups of apple mixture)

What is your favorite fall treat to feast on?

Monday, September 10, 2012

Quick and Healthy Veggie Stew for lunch

It is back to school time - which means back to packed lunches for me.  Packing lunches is one of those chores that I just do not care for.  I try to pack them the night before because I am out the door at 6:45am and I am NOT a morning person.  I have been making wraps with light Flat Out wraps, hummus, artichokes and other veggies, but I am already bored with cold lunches.

My poor neglected and almost finished garden came to the rescue!  
Japanese Eggplant from my garden


I have had a bumper crop of japanese eggplant this year and had four large ones to use.  So I decided to make up a batch of Veggie Stew with Couscous.  


This is me getting fancy with my new Hipstamatic app.  :-)


The Veggie Stew is a recipe that I ripped out of an old Family Circle Magazine (September 1993).  I have 3 big binders full of extremely disorganized magazine clippings that I'm going to organize "some day."


I think maybe color photos are better for food?  Yes?


Here is the finished product.  It will end up in my lunch tomorrow on a bed of couscous with a light sprinkle of crumbled feta cheese. 

Veggie Stew with Couscous 
Nice change from a cold sandwich!

Veggie Stew with Couscous
  • 1 large eggplant or about 4 medium japanese eggplants , cut in1/2-inch chunks (about 7 cups
  • 2 zucchini quartered lengthwise and cut into 1/2 inch chunks (about 3 1/2 cups)
  • 2 cans (14.5 oz each) seasoned diced tomatoes (I used fire-roasted this time to change it up but I usually use Italian seasoned)
  • 6 scallions or about 1 cup of onion finely diced
  • 1 Tbsp red wine vinegar
  • 1 tsp each dried thyme and salt.  (I used one large bunch of fresh thyme from my garden - just threw it in stems and all)
  • 1/2 tsp pepper
  • 1 can chickpeas, drained and rinsed
  • 4 ounces feta cheese, crumbled
  • 1 cup instant couscous, prepared according to package directions
1.  Heat 1 Tbsp canola oil in a Dutch oven over medium-high heat.  Add the eggplant and cook 4 minutes, stirring often, until lightly browned.  Remove from pan.

2.  Add another Tbsp oil and zucchini and onion.  Cook 3 minutes, stirring once or twice.

3.  Add the tomatoes, vinegar, thyme, salt and pepper.  Simmer on low for 20 minutes until vegetables are soft and flavors are combined.

4.  To serve:  Put couscous on the bottom of a plate or bowl.  Spoon veggie stew over the couscous and top with feta cheese.

This stew gets better as it sits in the fridge so I try to make it ahead.  It is perfect for a yummy school lunch!  Now I can't wait for lunch tomorrow!


Tuesday, September 4, 2012

Garden Birthday party for Mom


Thanks to a family group effort, the garden party for Mom's birthday was a success!  The food was delicious and the decorations turned out just the way we'd hoped!  Unfortunately, my picture-taking was less than wonderful.  (I discovered that it is hard to hostess and photograph for a blog at the same time!)  

Here is an idea of some of the decorations that we set up on the deck:

Blurry picture - but you kinda get the idea...

We set up lots of candles on the tables and more candles in the wooded area - including hanging candles in the trees.

This picture came out!  Yay!
There were flowers all over the deck and twinkle lights on the railings.  It really looked pretty as the sun began to set...You'll have to believe me because the pictures are not so great...

We set up the food buffet in the house.


We wrapped the bamboo forks and knives in the napkins and then tucked in a sprig of fresh rosemary.


Here's a look at the food on the buffet.  We had plenty of food!


Lamb with a Matzo crumb crust and citrus sauce:


Turkey Breast Stuffed with Prosciutto, Parmesan and Pine Nuts
This is from an old BH&G magazine that I saved.  I'm too tired to write the recipe tonight, but I will if I get a request in comments...


Sweet and Yukon Gold Potato Gratin and Marinated Green Beans with Tomatoes and Olives:
Find the recipe for the green beans here.


And...The Grand finale...


Chocolate Cherry Port Wine Cupcakes with Marscapone Frosting
Find the recipe here.


It was truly a group effort to get all the cooking done!  My sister made the lamb.  I worked on the turkey.  My brother was in charge of the green beans and my daughter made the cupcakes.  And then there were appetizers and drinks and coffee...At one point, I am pretty sure that there were about 12 people in my kitchen all working together to make this party happen for Mom! Literally!

Thank goodness my brother was able to get some nice photos of the food! 

In the end the party was a blast!  We were able to celebrate Mom's birthday and have a mini family reunion too. (We were missing my Navy girl, though!)

And the best part...There were enough leftovers to do it all again the next night with just family.  

What a wonderful way to end the summer!  I hope that you had a wonderful summer and are looking forward to your own family feasts this fall.

Love,
Pam